Heater Core!

I’ve been getting frustrated with not getting anywhere for a while, so I decided to get started.  I had the old heater core from the S10, and although it’s not that powerful, it’ll be enough to take the edge off.

So I grabbed the factory service manual and got started ripping the dash off.

dash-board-nothing

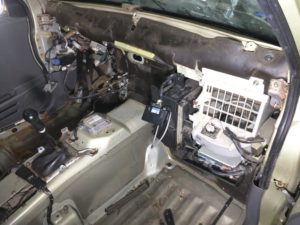
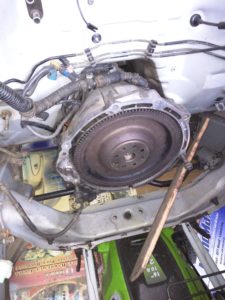
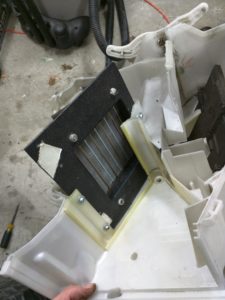
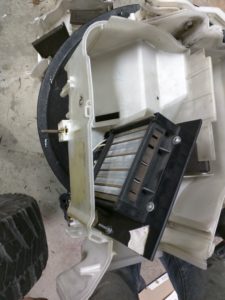
Never had one of these apart… and the FSM told me to disconnect all the A/C lines… well that wasn’t going to happen.  That’s one of those “must haves” in my build. Lucky enough though, with the engine out and loosening all the bolts to the A/C Condenser I was able to slide it far enough out of the way to get the heater box off.  Then I took the existing core out, and slid in the electric one.  I fabbed using some 1/8 inch plastic that I had pulled from the heater box of the S10. Measured it up and slid into place.  Put a few bolts in it so it won’t move and voila!

heater-core-1 heater-core-2 heater-core-3

One thing that I didn’t take pictures of unfortunately, is that I have expanded the heating system for a future purchase of a diesel heater.  This was something that was mentioned to me from a guy who is a member of SEVA (http://www.seattleeva.org/wp/ – and I don’t use his name only because I haven’t sought permission).  He has been super helpful to a rookie like myself.  The heating system is a Diesel heater similar to the ones that truckers use for sleeping in their cabs so they don’t need to run their big engine all night. They are relatively expensive ($500 USD) but solve a few problems EV’s have.  1 problem is your heater can burn up to 30% of your pack if it’s on all the time – and range is one of my biggest problems as I drive a lot!  2 is defrosting can be an issue if you don’t run your A/C. This heater solves that.

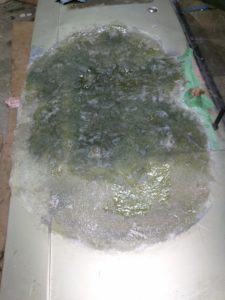
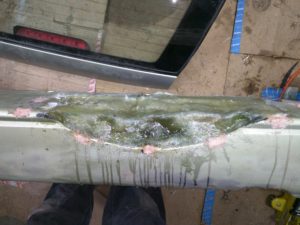
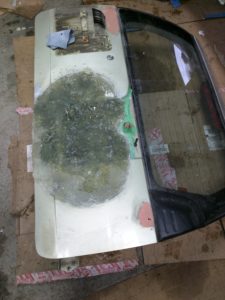
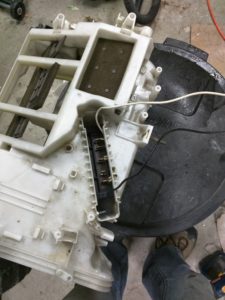
So because of the cost, I decided to do some research and found this website (http://300mpg.org/imiev-heater-installation/) and decided to cut a hole in my heater box and install an outlet into the engine bay.  Most of the time these heaters are used they are put inside the cab and the exhaust  and fuel lines are run outside.  I don’t have room in the car and I don’t want it sitting out so I will put it in the engine bay.  There will be a direct line into the cab, through the fire wall which has now been cut and sealed so hopefully I won’t have to pull the dash again.  When I’m ready I can just hook up the heater and away we go!

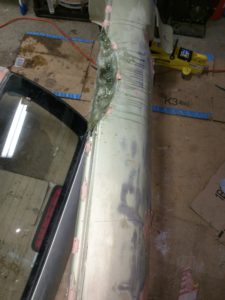
Last thing I did with the dash off is cut a 40 mm hole in the firewall in an inconspicuous spot and put a set of PVC piping in.  This allows me to seal a firewall hole, but have a simple, safe solution for running wires through the firewall.  There will be a lot of wires, and I don’t want them getting cut on the steel or having the drill a lot of holes.

Once all that was done, I put the dash back on with the help of a buddy.

More Drivetrain Pondering

Still no solution on the drivetrain.

With this being a custom build (ie this transmission has never been done before) I’m still struggling with the connection of the motor to the flywheel.  I’ve done a lot of reading and really thought about doing it myself, but I want it to work and not destroy my bearings/motor/transmission etc.

I have no problem making the bell-housing adaptor, but the coupling is a problem.  I almost sprung on a Taper-lock as some before me have suggested, but the precision that is needed to adapt it for my use scared me, and getting a machinist aboard isn’t something I really wanted to do.

I went to Canev (http://www.canev.com/index.php) where Randy is one of the most helpful guys I’ve ever met and tried to adapt an existing coupling but none fit.

Looks like my only choice at this time is to ship my entire transmission to EVWest (http://evwest.com/catalog/) and have them custom build it for me. This will be in the range of $1600-2000 CAD.  At least then it’ll be done right.

Excuse the ghetto caliper.  My precise one wasn’t available at the time.

flywheel-measurement-2 flywheel-measurement-3 flywheel-measurement

Fibreglassing

In my infinite wisdom I bit off a bit more than I can chew.

Years ago I fixed up the fibreglass of a boat and it went well… thought I could do a bigger project this time.

I decided that I had a few problems.  I didn’t want the spare tire on the back of the car, but the look without it was terrible.  The bumper had a divot in it and the rear door was in bad shape. The previous owner had backed into a wall with the tire, and when you left it on you couldn’t really tell the damage.  It had dented the door pretty bad and it needed to be fixed up. So why not fibreglass the whole thing to look like the tire wasn’t there ever!

I’ve only just begun and learned a few things I did wrong (there are many) but I’m determined to make this work!

rear-bumper-fibreglassing rear-door-fibreglassing-2 rear-door-fibreglassing-2 rear-door-fibreglassing

Measurements for the Drivetrain

I’ve been tossing around how to couple the motor to the transmission.  I’ve decided that I want a clutch so my wife can drive the car, and that’s about it. There is nothing I can find off the shelf so I have to build it.

I put the clutch back together and took some measurements…  I also have the parts from the S10, so I’ve been trying to explain this to a buddy who is a shop teacher at a high school… so I had some other pictures.  Too bad the S10 and the Vitara weren’t compatible!

drivetrain-ev-clutch-installed 2016-11-02-04-41-35 2016-11-02-04-41-59

Summer wasn’t too kind

Well summer was tough.  We went on 2 giant road trips and did not spend a lot of time at home. Needless to say not much work has been done.

I have sold most of the parts from the S10 and Vitara (parts I don’t need) so that’s a plus and now it’s time to get back to work!  Onwards and Upwards!  PS… I’ll get better at taking pictures!